To set up Windows Live Mail with Runbox, please follow the step-by-step instructions below.
Note that the set-up process and dialogue boxes on your computer may vary from what is shown here, depending on what version of Windows Live Mail you are using.
Contents
Add a New Account to Windows Live Mail
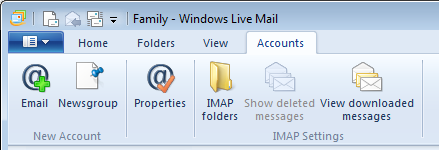
To add a new account go to Accounts and then the Email button as shown below.
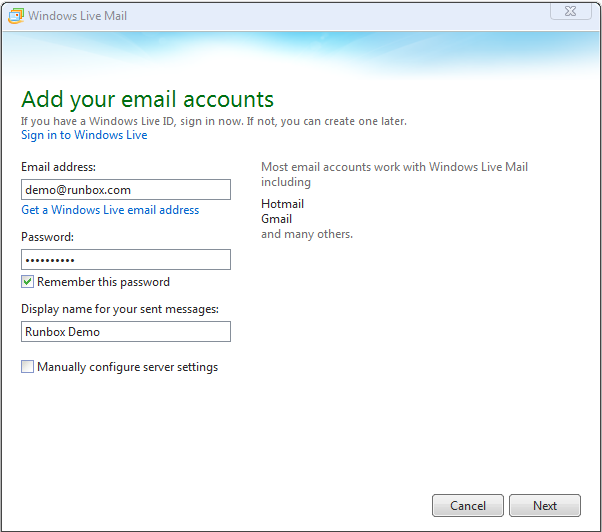
This will launch the email set up process as shown below. Enter the details for your account on this screen and click Next.
Enter the Server Details
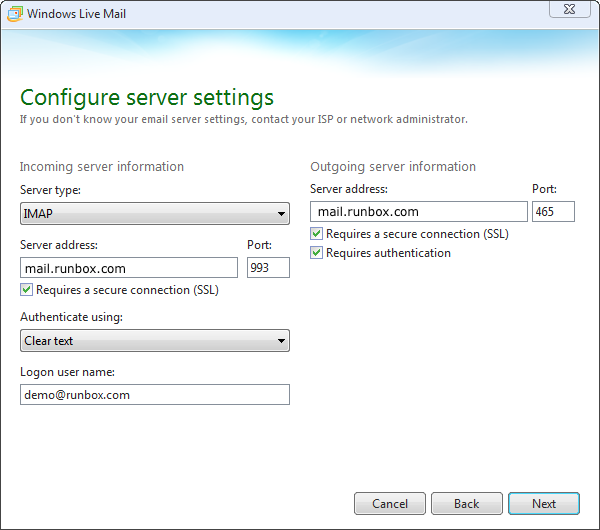
On the next screen choose the service type IMAP as required and enter the details for your own account, plus the server details for Runbox.
Incoming Mail Server: mail.runbox.com
Outgoing Mail Server: mail.runbox.com
Username: your primary Runbox email address (aliases cannot be used as log in usernames)
Now click Next.
Windows Live Mail will tell you that the account has been added, and you should see it listed on the left of the screen.
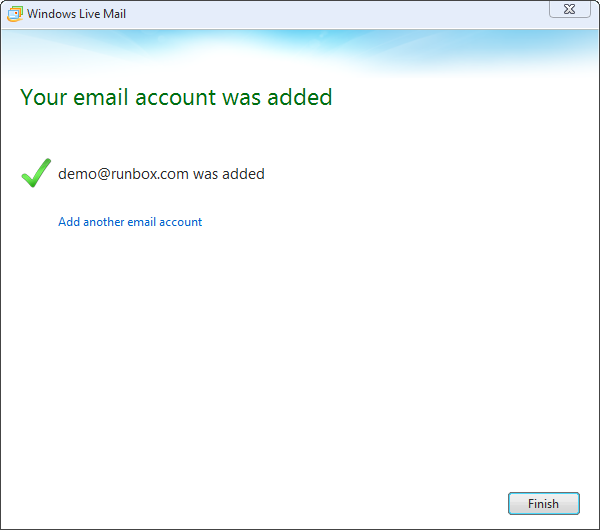
Click Finish so that we can continue to set up the account.
At this point you might be tempted to think that the process has been finished, however we still need to give Windows Live Mail some additional details so that the account is properly synchronised with your Runbox account.
Configure Account Settings
We need to tell Windows Live Mail which folders to use for Sent, Trash, Spam and Drafts.
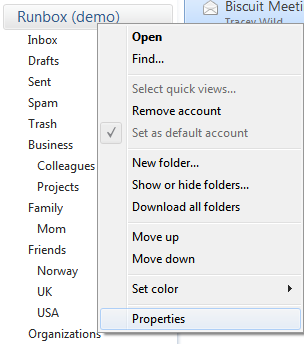
As shown in the image below, right-click on your account name, and select Properties.
Click on the IMAP tab of the window that opens and you will see a screen similar to the one below.
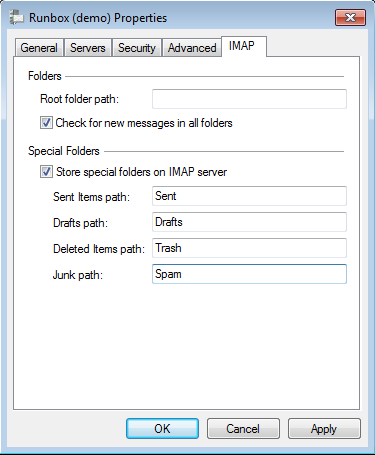
Change the names of the “Special Folders” so they match what you see in the graphic above. This ensures that Windows Live Mail puts messages in the same folder as when you are using the Runbox webmail.
Making Sure Folders Appear Correctly
If you don’t see all your folders in the list on the left, it might be that you need to tell Windows Live Mail to show them. This is called “subscribing to folders”, but in Windows Live Mail it is just called “Show/Hide IMAP Folders“.
Click on Accounts at the top of the screen, and then IMAP Folders.
This will open up a window like the one shown below.
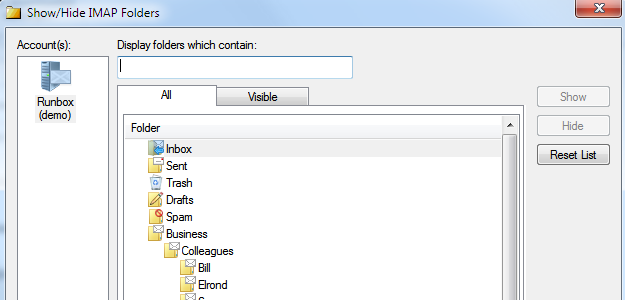
In this window the All tab shows you the folders that exist in your account. The Visible tab shows the ones you actually see in Windows Live Mail. It is recommended that you click Reset List in the All tab and then check that what you see there matches what you see in the Visible list.
Folders in the Visible list that will not be shown are greyed out and do not have a folder/envelope icon next to them. You can choose which folders are visible and which are not using the Show/Hide buttons.
Once you are happy with the settings click on OK.
You have now completed the set up of your Runbox account in Windows Live Mail.