
This article describes how to set up the Runbox email service with the Mail client on an iPhone or an iPad.
Note: When you first create your Runbox trial account SMTP (outgoing mail) will be unavailable to you until you either a) validate your alternative email address (we send a validation link there when you create the account) or b) pay for a subscription. If you don’t do either of these things you will get a username/password error when trying to use our outgoing SMTP server.
The details and screenshots may differ slightly on other versions of iOS and iPadOS. For other smart phones, please refer to the information found in the basic IMAP and POP setup guides.
Contents
1. Finding where to add a Mail account
Open the Settings app on your device. Then go to:
Apps > Mail > Mail Accounts > Add Account
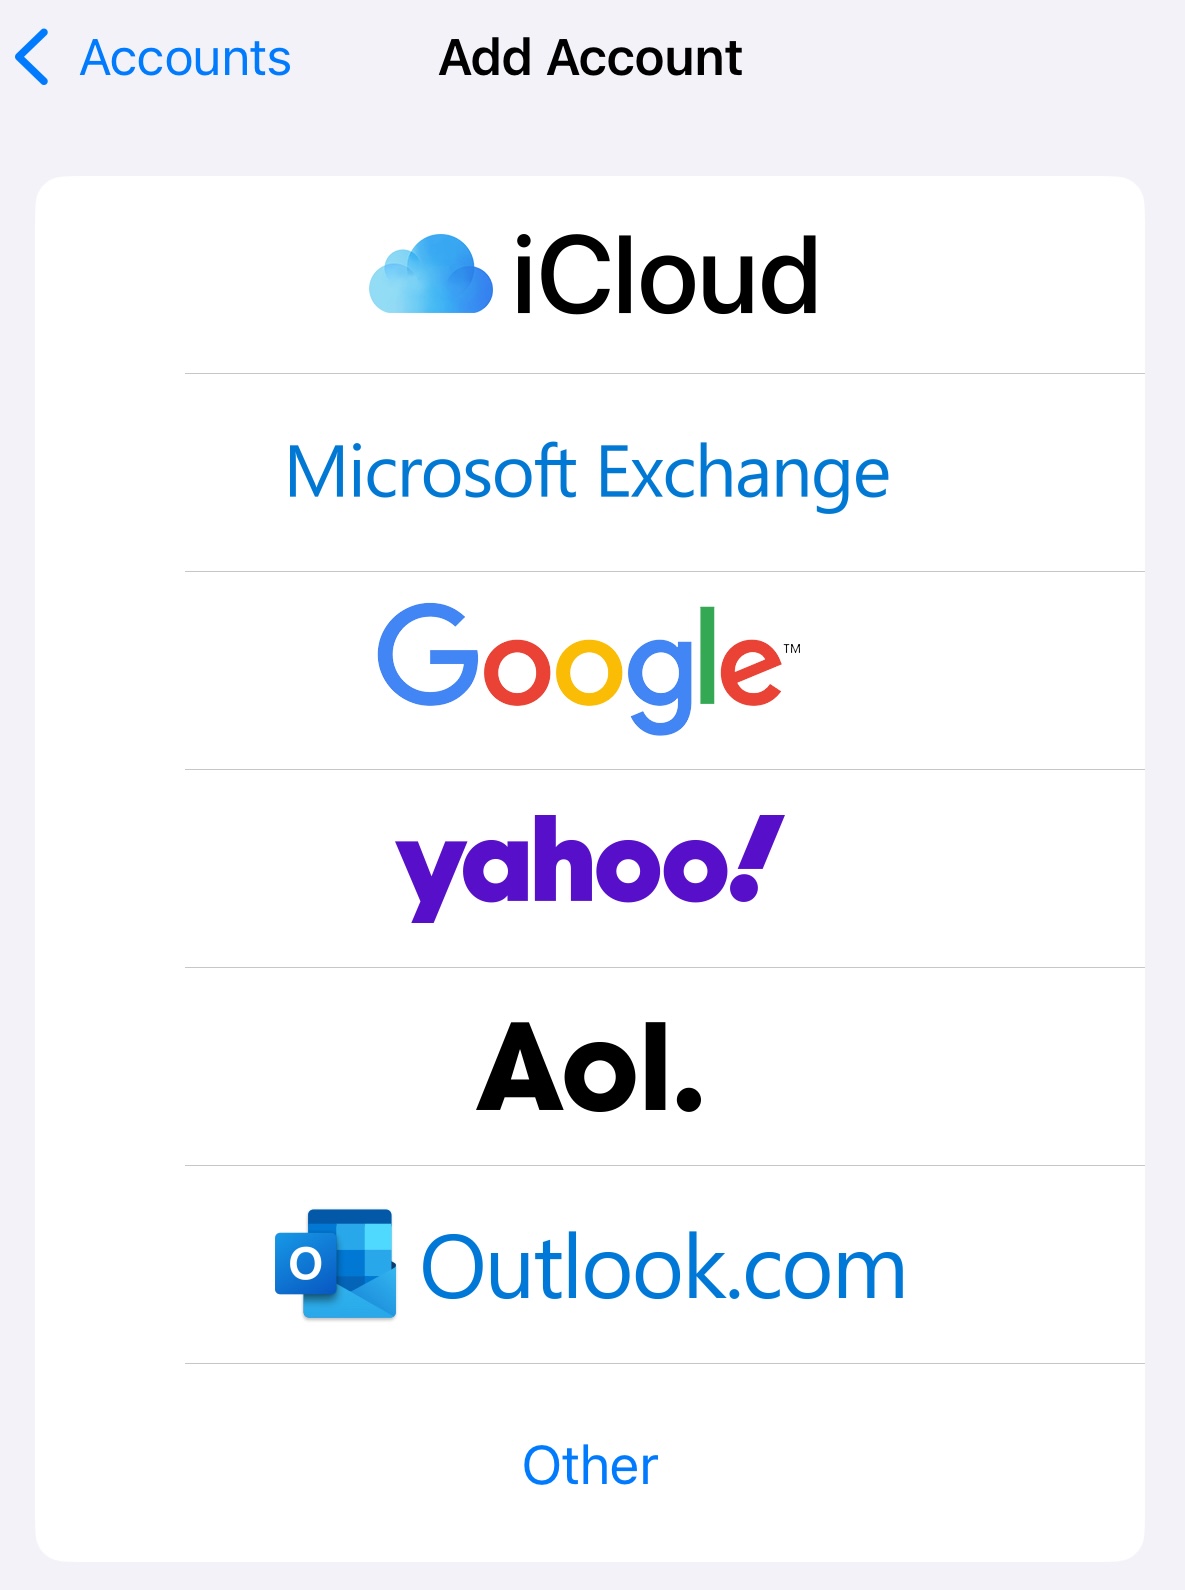
2. Select Service Type
Tap Other (Think Different!).
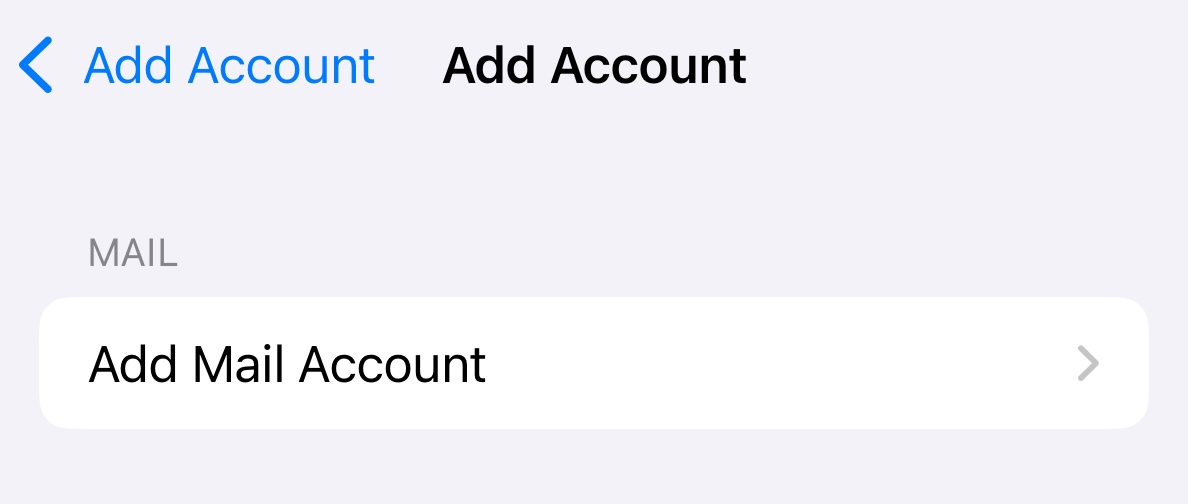
3. Add Mail Account
Tap Add Mail Account.
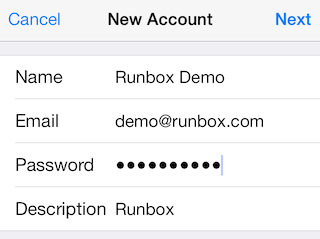
The New Account screen will be displayed:

4. Enter Basic Account information
Enter your name, email address, password, and optionally a description for your Runbox account, and tap Next when you’re done.
Your iPhone will now look up and verify the entered data and return a screen for you to enter further details.
6. Enter Incoming and Outgoing Mail Server Details
You will see that IMAP is selected as the default account type. This will allow for full synchronisation of all folders between your account on the server and your device, and is the recommended setting.
If you wish to use the simpler POP method to only download messages in your Inbox, please refer to the POP help section.
Note: Your device’s screen may say that the Outgoing server details are optional. They are not optional for a Runbox account because your device must log in to send email through our servers as well as receiving Incoming mail. This is to stop people who are not Runbox users sending messages through our servers.
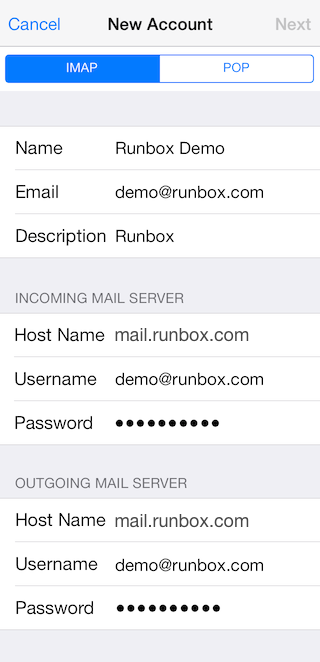
The settings for Incoming and Outgoing server details are the same. All of the details on this page must be completed including username and password for the Outgoing mail server.
Incoming Mail Server (IMAP): mail.runbox.com
Outgoing Mail Server (SMTP): mail.runbox.com
Username: your primary Runbox email address (aliases cannot be used as log in usernames)
When you are finished tap Next. The iPhone will verify these basic details and return you to the screen shown below.
7. Turn Off Notes
We recommend you turn off the notes feature as it is not properly supported between Runbox and the iPhone.
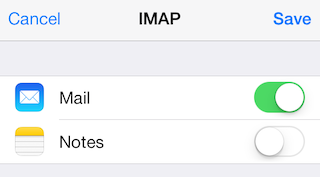
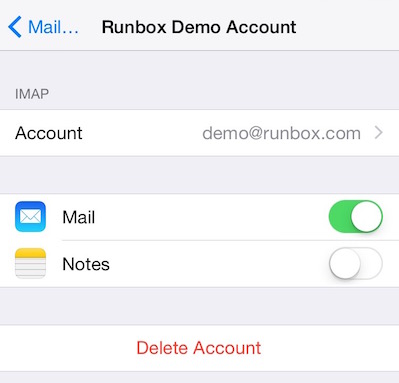
Tap Save when you’re finished. Your iPhone will verify the data you entered and return you to the main screen for Mail, Contacts, Calendars:
The set up is not complete and you must follow the steps below
for your Runbox account to work properly with your iPhone.
8. Select System Folders
You will now set up your phone to use the system folders such as Drafts, Sent, and Trash.
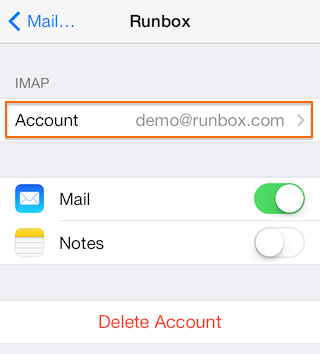
Tap the name of the account you just added, and then tap the account email address again (as shown below) to go in to the settings screen.
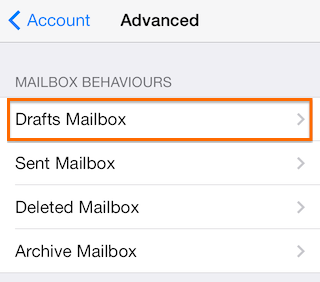
Scroll down to the bottom and tap Advanced.
Tap Drafts Mailbox under Mailbox Behaviors to select which folder to use for drafts.
At the top it will show that Drafts “On My iPhone” is selected. Lower down your iPhone will show all the folders currently on the server in your account. Scroll down and select Drafts from the list.

Press Advanced at the top left to return to the previous screen. The screen will reflect your choice of folder.
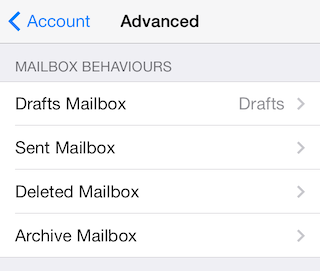
Repeat this step for the Sent and Deleted mailboxes, selecting the Sent and Trash folders on the server.
Runbox does not have a default Archive mailbox, but if you want to create one in your account by logging in to the Runbox webmail, you can then select that folder as the Archive Mailbox too.
When you are finished tap Advanced at the top of the screen and you will be taken back to the previous screen which will look as below.
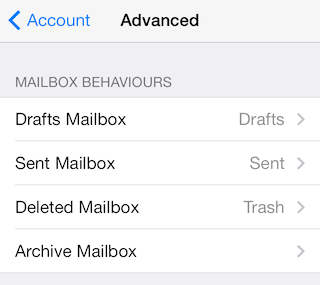
Note: You will also need to tell it what to do with Deleted messages. Set Move Discarded Messages Into: Deleted Mailbox
Now tap Account, and on the next screen Done.
This completes the set up of your Runbox account on your iPhone/iPad.
9. Optional – Using aliases with an iPhone/iPad
Mail on iOS has the ability to let you set up different aliases. An alias is an alternative email address that delivers to another main account address. This feature isn’t identified in the software during set up neither is it obvious afterwards, but if you follow our simple instructions below, Mail will allow you to use aliases.
On your iPhone or iPad go to Settings and choose Mail, Contacts, Calendars and then choose your Runbox account from the list.
Tap on the Account field where you see your email address and you will be taken to the account settings.

Next tap on the Email field where you see your email address.
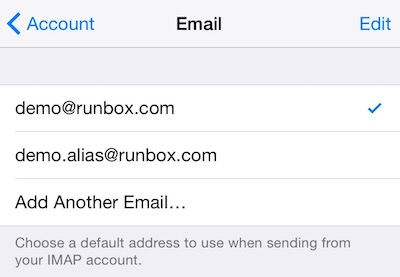
Under where you see the existing email address type the alias address, in our example we used demo.alias@runbox.com. Then tap Return. If you don’t tap Return the alias is not added to the account even though you see it on screen.
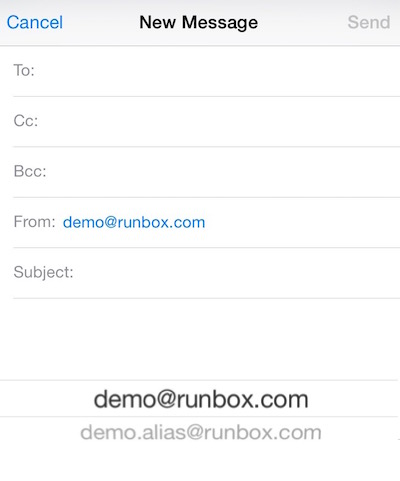
When you compose a message, the aliases are available to you by tapping on the From field.
If you need any help with setting up Mail in iOS or iPadOS please contact Runbox Support.