
If you have not already installed the GPGTools then you should go back and do this now.
Installing GnuPG on Apple Mail OS X (GPGTools)
Contents
Creating a Key Pair
It is probably worth reminding ourselves what we are about to do. We are going to generate an key pair. It is a pair because there is a private key that you keep safe and never give to anyone else, and a public key you can give to others and upload to a key server so others can find it. The public key is used to encrypt messages to you, and the private key is used by you to decrypt those messages.
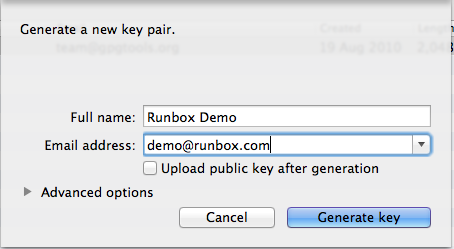
As the installation completes the GPG Keychain Access program will launch and prompt you to create your key pair. A window like the one below will appear.
We suggest you accept the default options for your key pair, but if you want to look at the Advanced options you will see a screen like the one below.
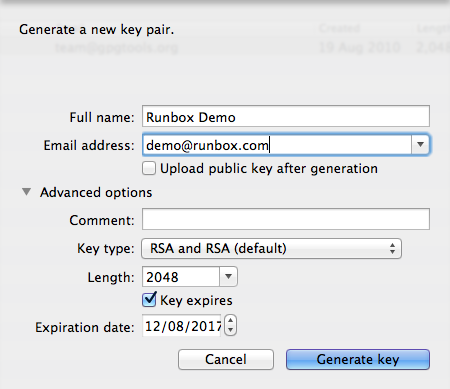
Except for the key length which cannot be changed after the key pair is generated, you can change all of the other options at a later time. We recommend you upload your key later to give you chance to try it out first to make sure it meets your needs.
When you click Generate Key you will be asked to enter a passphrase.
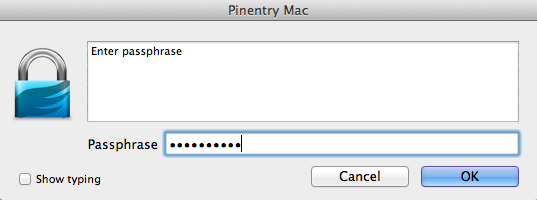
The reason you are asked for a passphrase rather than a password is to suggest to you that something longer than a single word password would be desirable. This passphrase along with keeping the private part of your key pair safe is what is going to protect your encrypted and signed emails.
When you click OK you will be asked to confirm the passphrase (to make sure you typed it correctly).
Once you key is generated you will be taken back to the main keychain window (below).

Generating a Revocation Certificate
We recommend you generate a revocation certificate at this point. You should keep this safe separately from your key pair so that if you lose your private key you can revoke it so that people know not to use it.
To create the certificate go to Key > Generate Revoke Certificate and choose some where to save it.
Trusting Your Key
The whole encryption key idea works on the basis that you trust that the keys of the people you keep on your system are genuinely from those people. If you don’t trust that the keys are from the people they say they are from then there is no real point in using encryption at all. You can set how much you trust each key as a property of that key.
You should set the trust level of your own key at this point. You created the key so presumably you trust it is yours. To set the level of your key (or any key for that matter). Follow the instructions below.
Select your key in the keychain window. Then go to Key > Show Info.
A Key Inspector window opens as shown below.
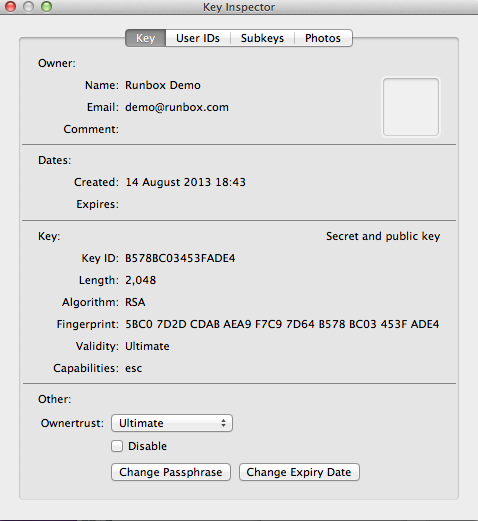
You can use this window to change the properties of your keys including adding additional User IDs (see below).
At the bottom of this window you will see Ownertust.
It’s your key, so you can choose the Ultimate trust option. Then click OK and you are done.
Adding additional identities (email addresses) to your key
You don’t have to have a separate key for each email address or identity you want to use the key for. You can add additional identities very easily.
Using the same window as you did for changing setting the trust level of your key, click on the User IDs tab.
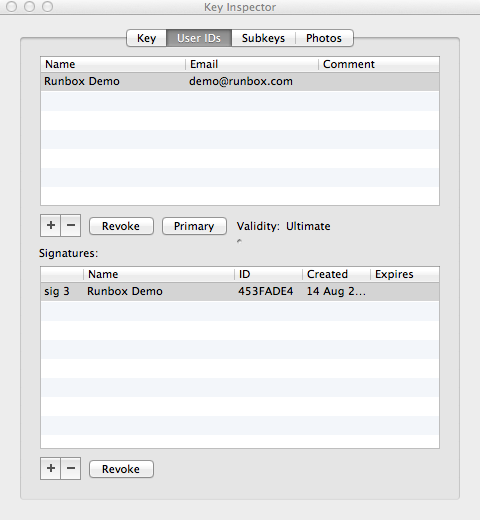
To add an additional email address/identity click on the + under the first box that lists Name, Email and Comment.
You will be asked to enter the name and email address of the new identity. Click Generate user ID when you are ready to add this new identity to your key pair.
You also have the option to set a primary email address. This is useful if one of your email addresses is known to others more than the others.
When you are finished close the Key Inspector window. Each time you add or remove identities from your key, you should upload it to the key server again (see below).
Uploading your public key to a key server
If you are happy with the key you have created (there is not much to be unhappy about unless you spelled your name or email address incorrectly) then you can upload the public key to a key server so that others can find it. You don’t have to do this right away as you might want to try out your new key first to make sure it does what you expect of it.
You should be aware that once a key is exported to a server that it cannot be removed from the server. It can however be revoked and other people searching for your key will see that you don’t intend that key to be used any more.
You might want to revoke you key if the private key is ever lost or stolen. However, it will still not be of any use to anyone (including you) if the passphrase cannot be remembered.
To upload your key go to Key > Send public key to Keyserver
Other people will now be able to search for your name or email address and download your public key. This lets them send encrypted email to you.
Using your key pair to send email
Now you have created your key pair, added any additional identities and optionally uploaded it to a key server you are ready to start sending email using it.
For instructions on how to use your new keys with Apple Mail and the GPGMail 2 add-on, follow the link below.