
Note: As of September 2018 (release 2018.4) GPG Mail is no longer a free plug-in for Apple Mail, and comes with a $25 fee for support for the current version.
Here we will look at how to send and receive encrypted and/or signed emails using Apple Mail with the GPGMail add-on.
Before we begin…
If you have not already installed GPGTools you should go back and do that first before trying to carry out the instructions on this page.
Installing GPG on Apple OS X using GPG Tools
Creating a Key Pair with GPGTools on OS X
Sending your first encrypted message
Note: At some points in this process you could be asked for the passphrase you used to create your key. This is to ensure you are the authorised user of the key.
To test that everything is working as it should be, you can send an encrypted message to yourself.
Open Mail and begin a new message addressed to yourself.
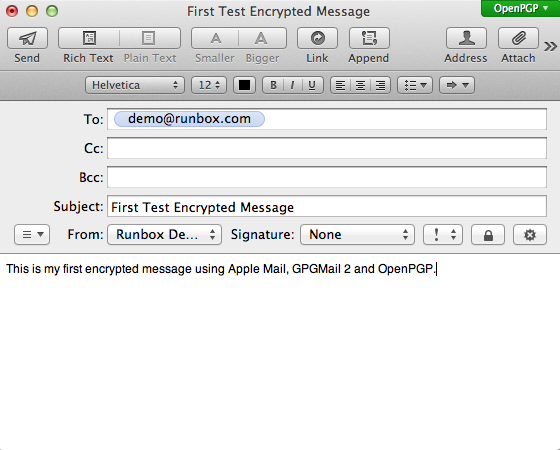
If Mail detects that it has a public key for the address you are sending to, then the lock icon just above the text of your message will appear black and will be selectable. Otherwise it will appear grey. Click the lock to close it as shown in the image below.
![]()
This indicates that the message will be encrypted. At the same time the OpenPGP icon at the top right of the window will turn green.
The icon to the right of the lock is for signing messages, we will come to this later.
You can now click Send and your message will be sent to you.
Reading your first encrypted message
You should find your encrypted message arrives quite quickly (it hasn’t had to go far!).
Click on it as you would any other message and you should see your message as below.
You might be asked to enter your passphrase when decrypting messages. You can always save your passphrase in the OS X keychain if you are confident your machine is secure and nobody could send messages on your behalf.
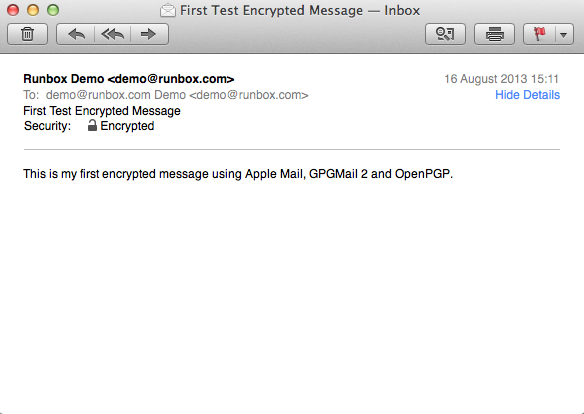
Your message will look very much like it did when you created it. They main thing to look for here is the line just above the message that says:
![]()
This shows that the email was encrypted when sent to you.
How do I know it was really encrypted?
This is a good question, and something you should check to satisfy yourself that it really was. Because the encryption is so well integrated with your email client, you never usually get to see the encrypted message.
To see the message as it was sent to the email servers, and also how it is stored on your machine:
Go to View > Message > Raw Source
A window will open to show you the message as it is stored on your computer.
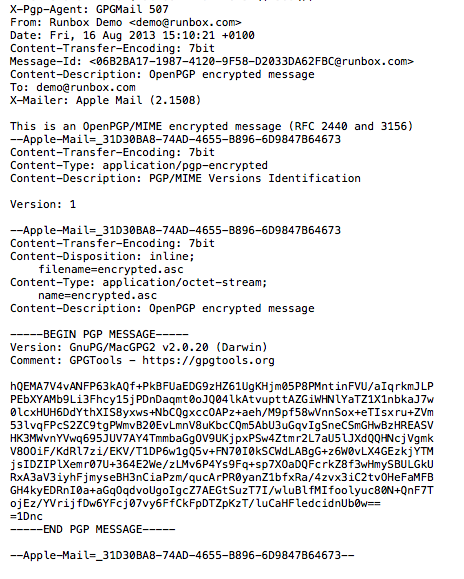
We have excluded the message headers in the screen-shot above just to make the image smaller.
It is worth having a close look at this window to familiarise yourself with what is encrypted and what isn’t.
You will notice that sender, recipient and the subject line are not encrypted. This is necessary or it would not be possible to deliver your message (certainly in the case of recipient anyway). Do not put anything confidential in the subject of your emails.
However, the entire body of your message was encrypted and you will not see the text “This is my first encrypted message using Apple Mail, GPGMail and OpenPGP.” anywhere.
Note: Any attachments to your email (such as photographs or documents) will also be encoded with no further action on your part. Once they are decoded at the recipient end they will appear just as in an unencrypted message.
Sending your first signed message
Compose another message addressed to yourself similar to the one below.
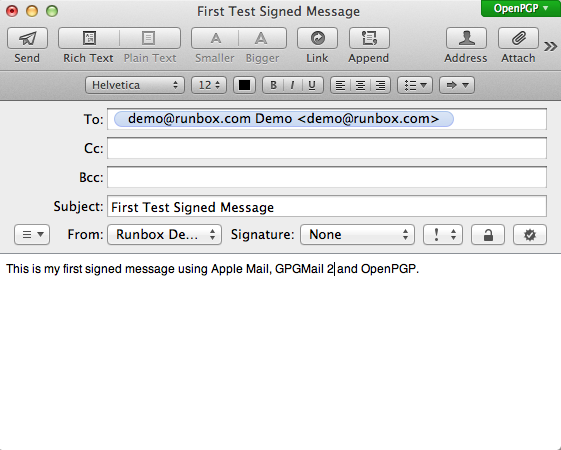
This time, click the seal icon above and to the right of the body of your message so that is shows as selected (as below). This will tell Mail to sign the outgoing message. You can always send signed messages whether you have the public key of your recipients or not.
![]()
You can now click Send and your message will be sent to you.
If you don’t want the signed option to be enabled for each new message by default, there is a way to turn this off by entering a command in the Terminal application.
To launch the Terminal application go to Applications > Utilities and click on Terminal.
You can copy and paste the following command directly in to Terminal.
defaults write ~/Library/Preferences/org.gpgtools.gpgmail SignNewEmailsByDefault -bool NOReading your first signed message
When you receive your signed email, open it and you should see a window similar to the one below.
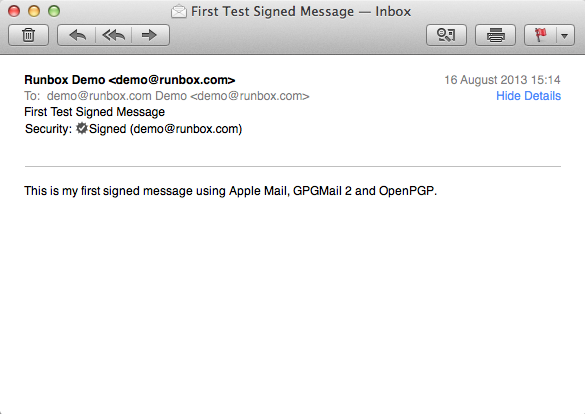
Here you will notice that under the messages headers and just above the content you see the line:
![]()
This tells you that the message was signed with the key for the email address mentioned.
If you click on the seal icon, a window like the one below appears to give you more information about the key used to sign the message.

If you receive signed emails from people whose public key you do not have, this may read “unknown key”. Keys have an ID number and Mail may try to download the relevant key from the key servers so that it can identify the sender. If it can find the key it will be added to your key chain.
As with the encrypted message, it is worth looking at the source code of the email so that you are aware of what signed emails look like in their “raw” format.
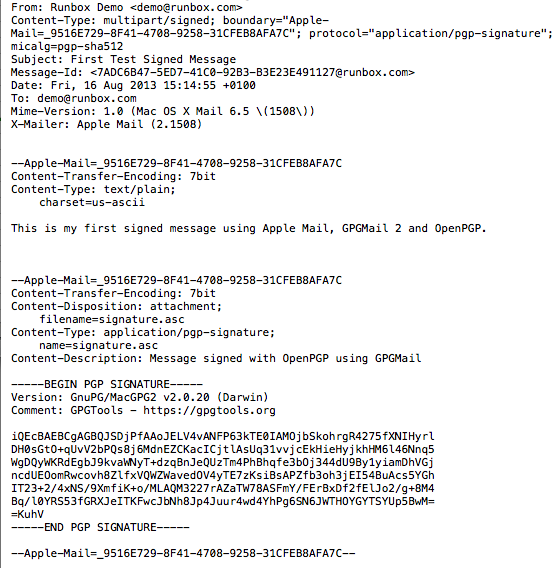
At first glance the source code looks similar to the encrypted message code. However, you will notice that the content of the message “This is my first signed message using Apple Mail, GPGMail and OpenPGP.” is now visible and not encrypted.
At the bottom of the email is a black of text starting with “—BEGIN PGP SIGNATURE___”. This is the OpenPGP signature that is used to verify the message is sent from you. In addition, the signature is based on the content of the message and so if the message is changed or tampered with before you read it the signature will be invalid and your email client will tell you this.
Note: You can encrypt and sign messages at the same time.
Start sending messages to people other than yourself
Now that you know how to encrypt and sign messages, you can start sending messages to everyone, right?
Well, perhaps not right away. There are a few things to consider first.
- You can sign messages with your own public key without needing the public keys of your recipients.
- Some people who use certain email clients or some webmail services will have problems reading any part of your signed messages.
- You can only encrypt messages to others if you have their public key.
- Others can only send encrypted messages to you if they have your public key.
Item 1 is not a problem, you already have your own key.
Item 2 can be a problem, and more information is available in our document Using OpenPGP – Some things you need to know.
Items 3 and 4 are easily addressed by uploading public keys to a key server. This makes it very easy for others to find your public key so they can send you encrypted messages. Depending on the configuration, Mail with GPGMail will try to automatically download the public keys of people who send you signed and encrypted messages so that they are available for you to use. This can only happen if others have also uploaded their public keys to a key server.
If a key is not available from a key server, you will have to ask the person who owns that key to send it to you.