Contents
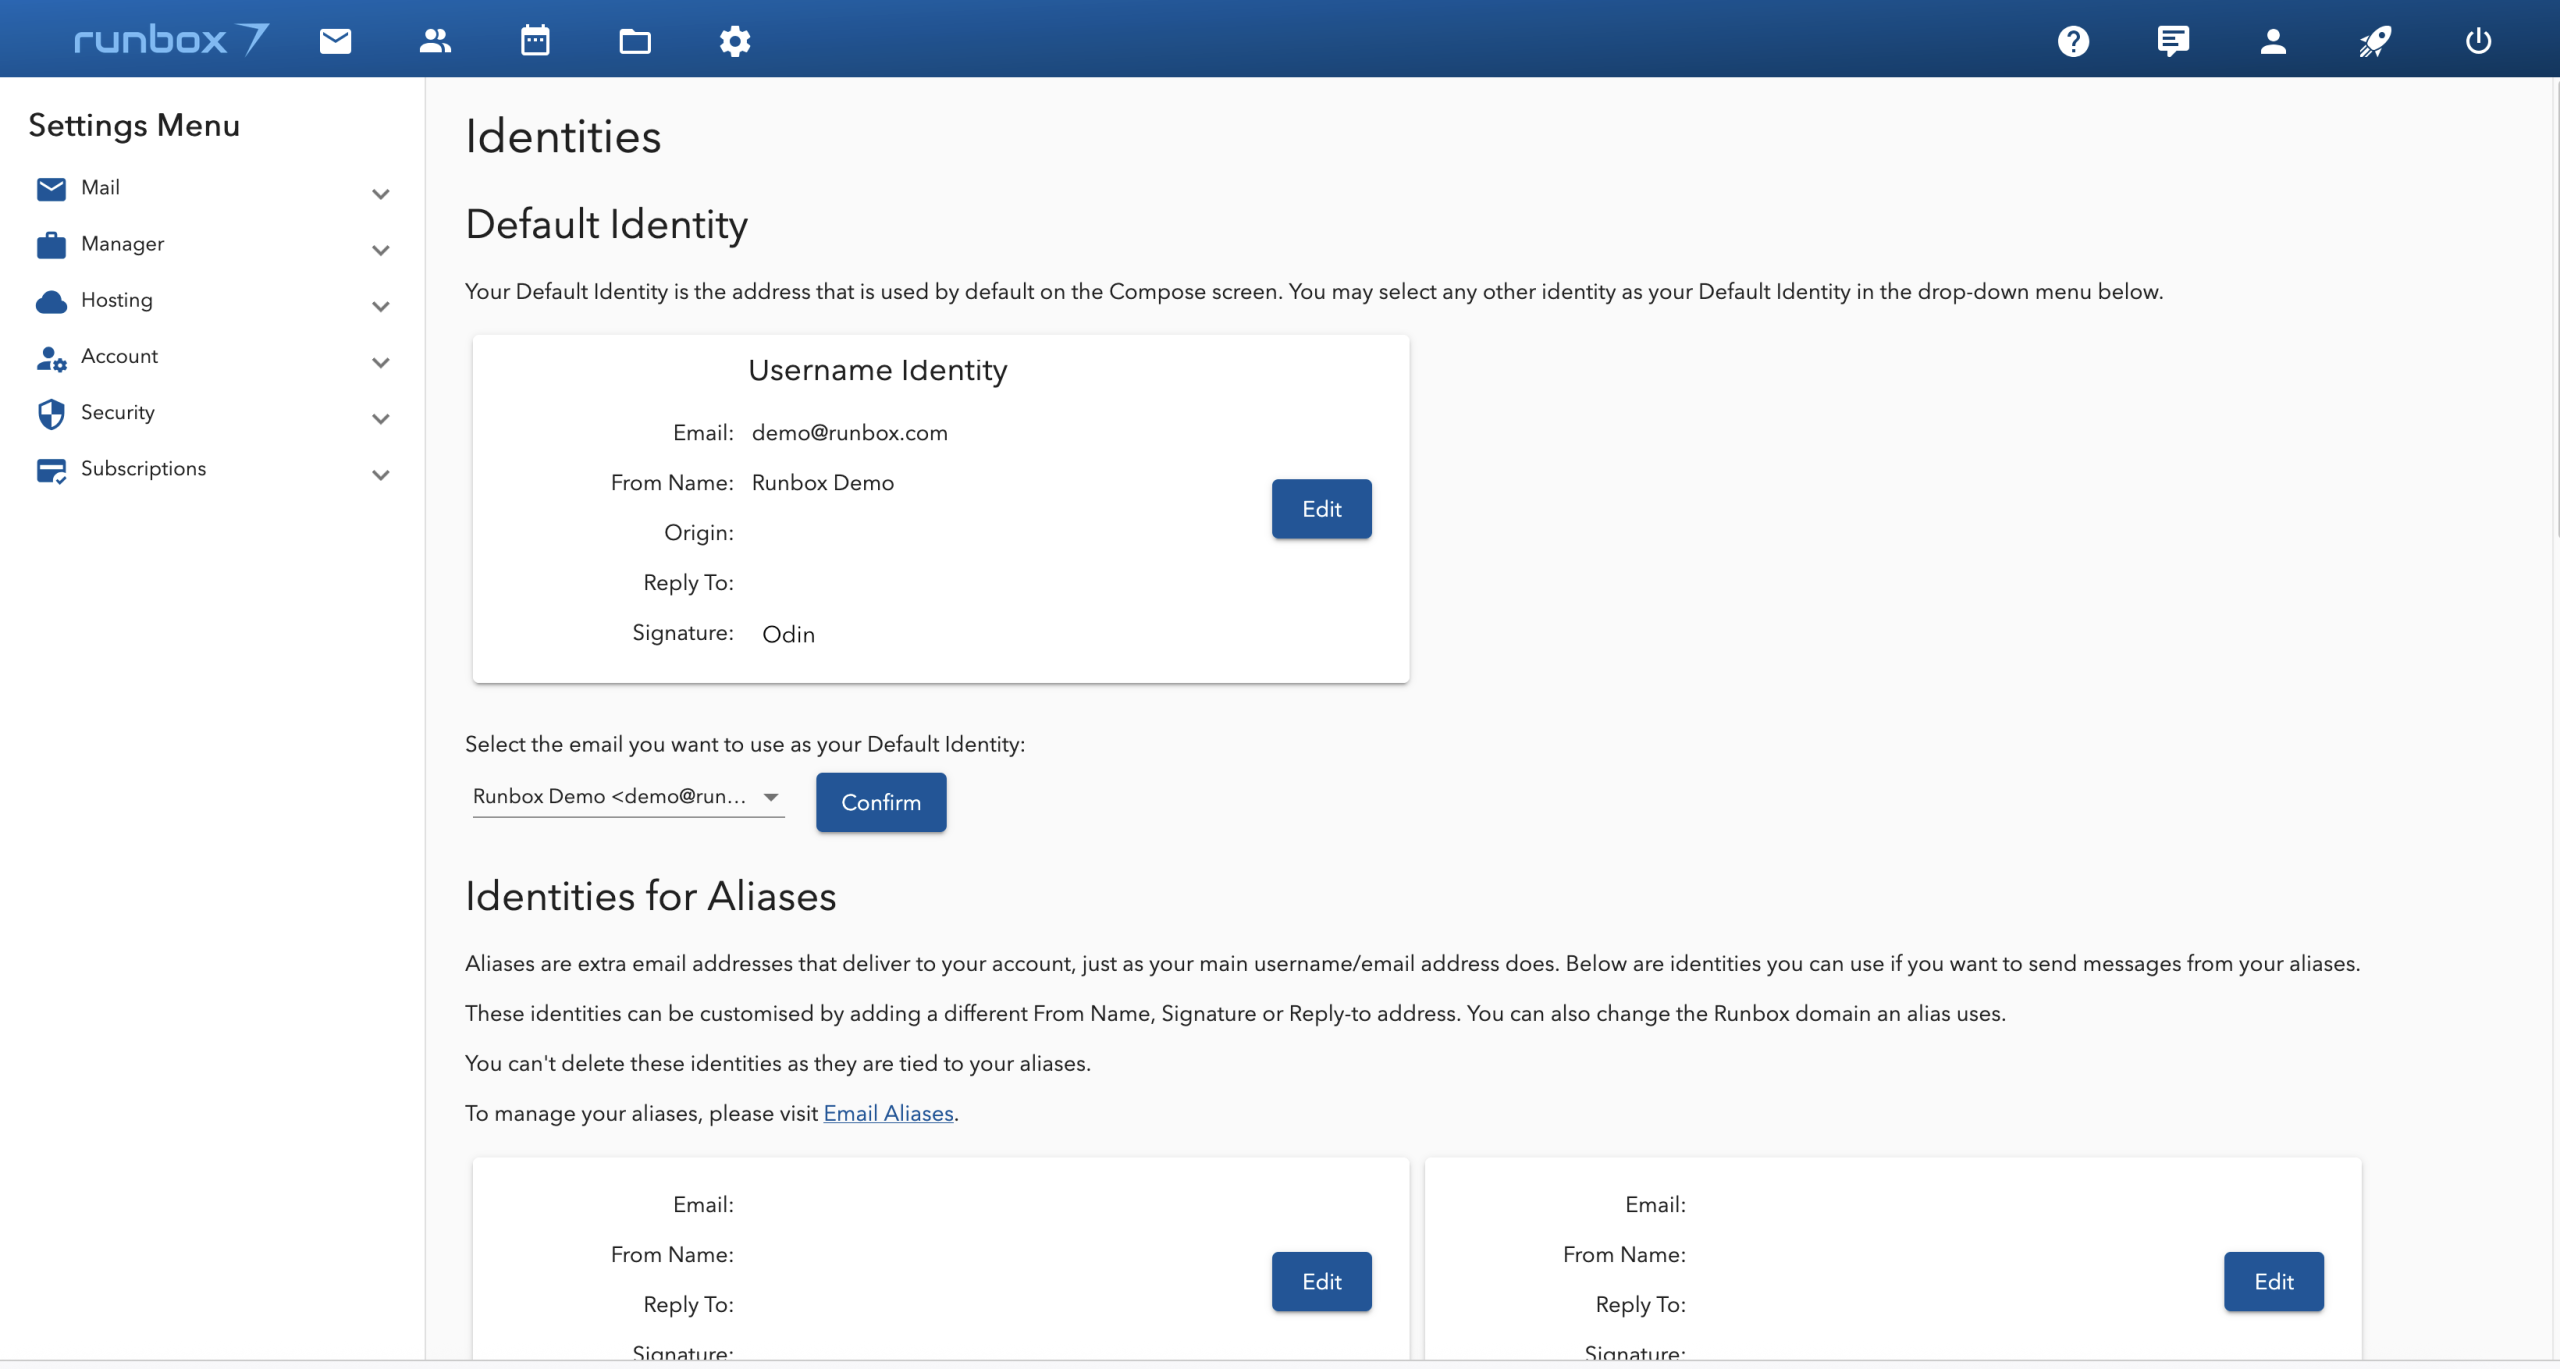
Default Identity
Your Default Identity is the email address automatically selected on the Compose screen. You can at any time using the drop-down menu.
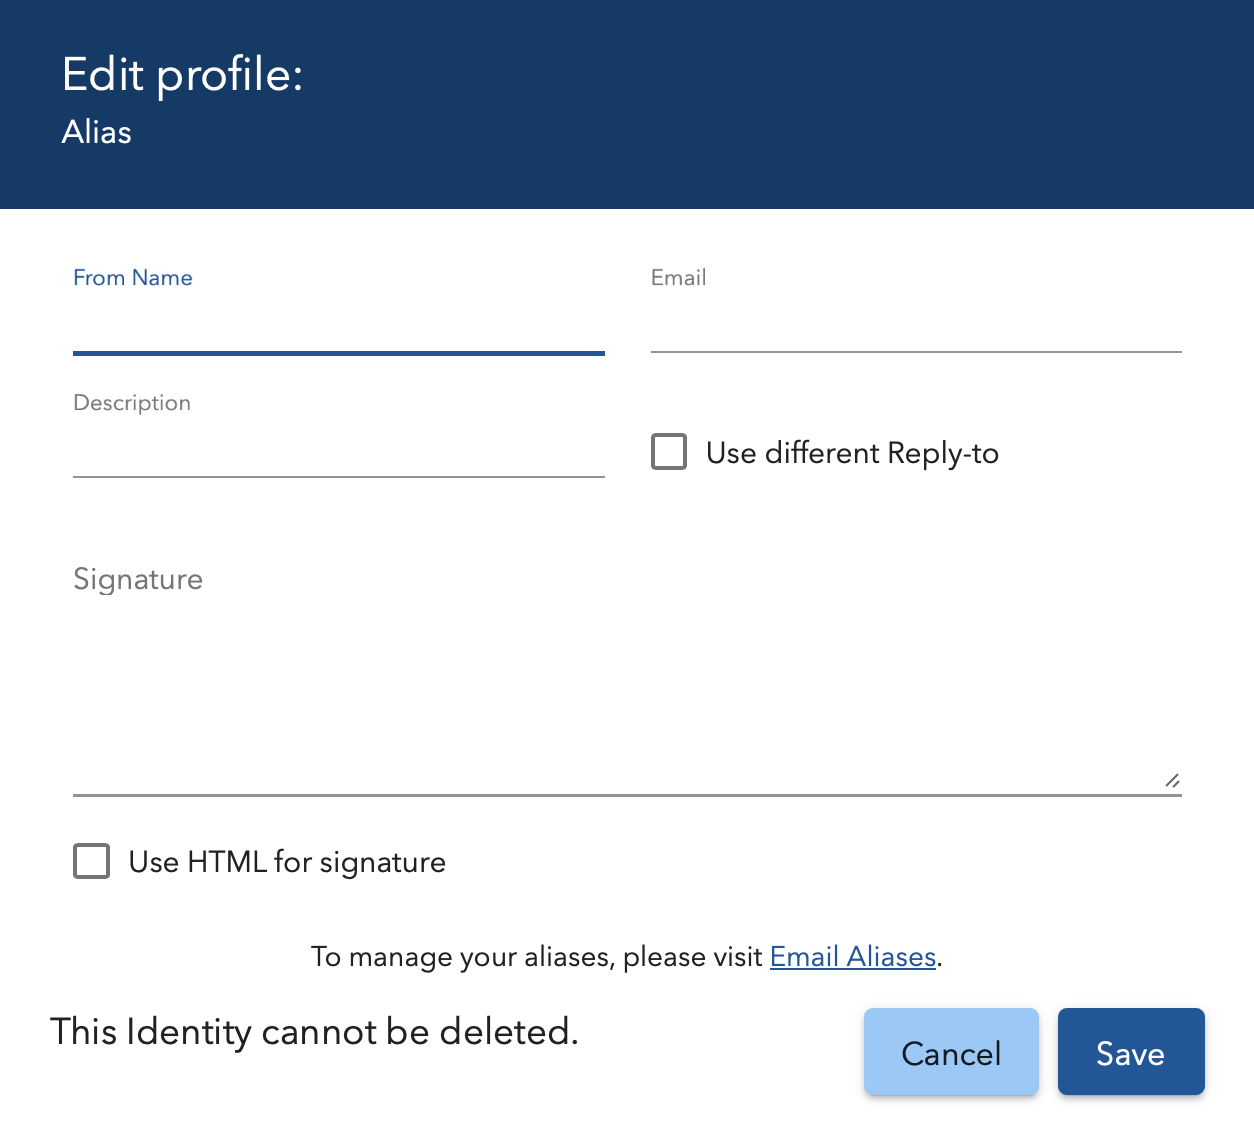
When you create an alias, it automatically becomes part of an Identity. You’ll have the option to customize details (such as the From Name, Signature, or Reply-to Address) or accept the pre-filled default values.
Identities for Aliases
Aliases are additional email addresses that deliver messages to your main account, just like your primary email address. You can use identities to send messages from any of your aliases.
Customization Options
- From Name: Change the display name for outgoing emails.
- Signature: Add a unique signature for each alias.
- Reply-to Address: Set a different reply-to address for each alias.
- Runbox Domain: .
Important Notes
- You cannot delete identities tied to aliases.
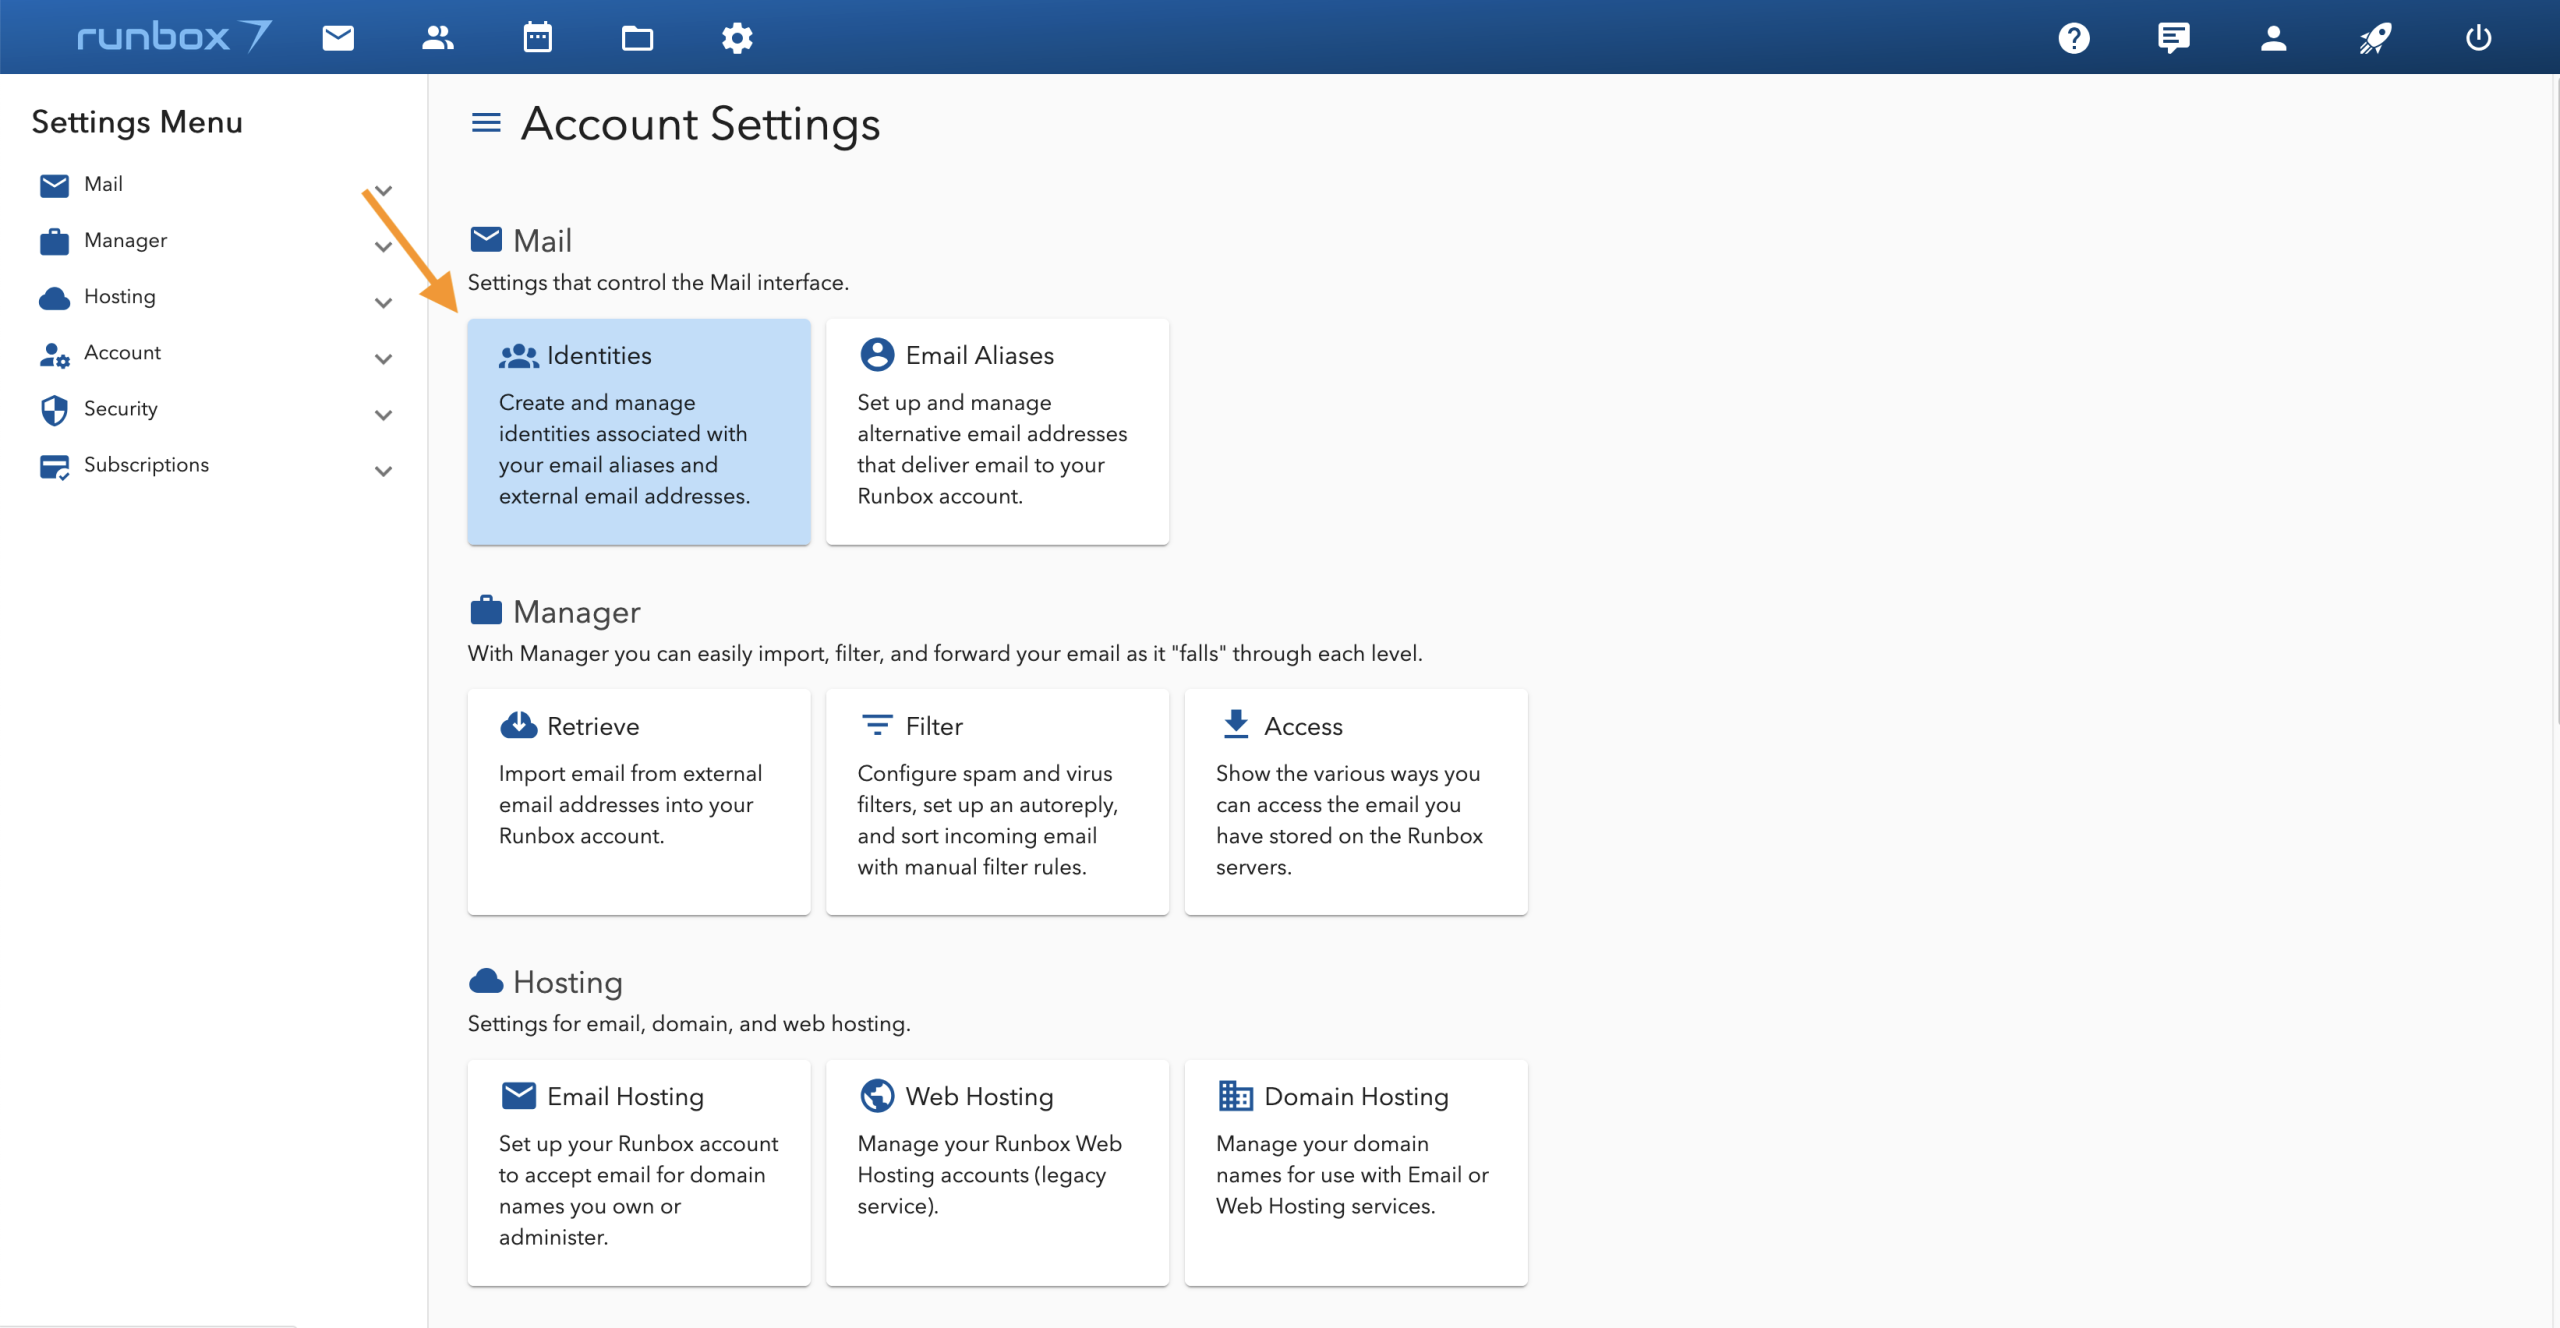
- To manage your aliases, go to Email Aliases in the Runbox 7 app.
In Runbox 7, the Reply-To function under Email Identities allows you to specify a different email address where recipients should send their replies, instead of the address you used to send the original email. This is particularly useful when you want to manage replies through a specific email account, even if you sent the message from another address or alias.
Reply-To
- Custom Reply Address: When you set a Reply-To address for an identity, any recipient who clicks “Reply” in their email client will automatically have their response directed to the address you specified, rather than the “From” address of your original email.
- Use Cases:
- You want replies to go to a shared inbox (e.g.,
support@yourdomain.com) instead of your personal email. - You’re sending from an alias but want replies to go to your main account.
- You’re managing multiple roles (e.g., personal, work) and want to keep replies organized.
- You want replies to go to a shared inbox (e.g.,
How to Set Up Reply-To in Runbox 7
- Go to Settings: Navigate to the Email Identities section in your Runbox 7 account settings.
- Select an Identity: Choose the identity (or alias) you want to customize and click edit.
- Edit Reply-To: Check off the “Use different Reply-to” box, and add Reply-To Address where you want replies to be sent.
- Save Changes.