
To set up Microsoft Outlook 2016 with Runbox, please follow the step-by-step instructions below.
Note: We also have instructions for Microsoft Outlook for Mac
Note: We do not recommend Outlook if you need to send email from any alias addresses you have set up in your Runbox account as Outlook does not support sending from aliases.
Add a new account to Outlook 2016
To add a new account go to File > Add Account.

You will be shown the screen below.
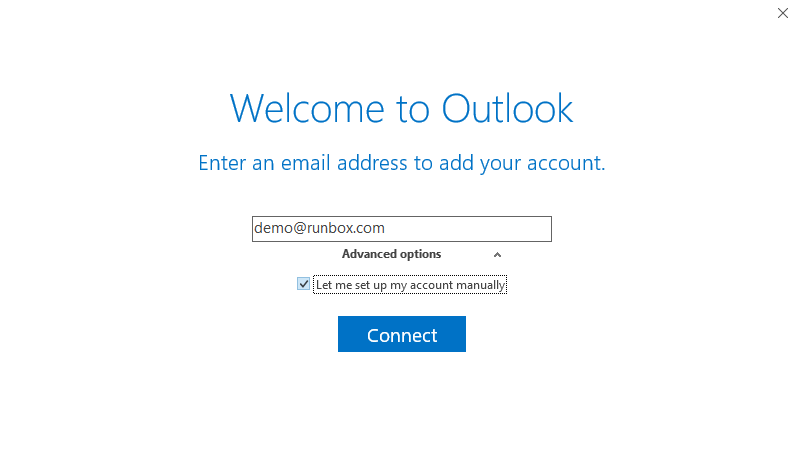
Enter your email address, and then click Advanced options and choose Let me set up my account manually.
Then click Connect.
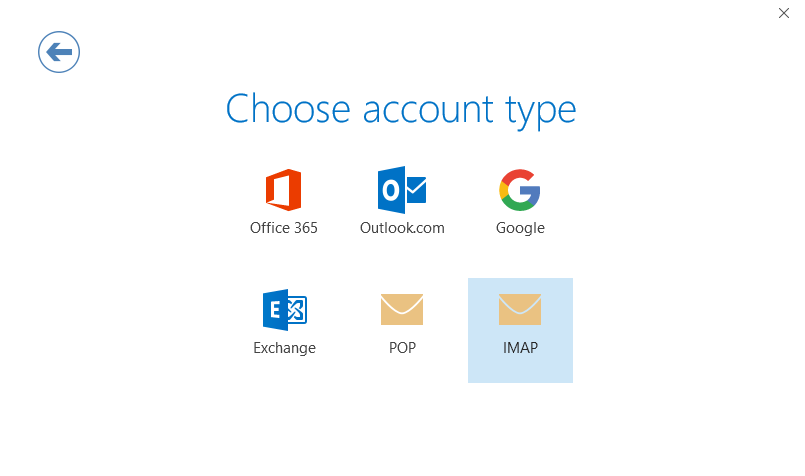
On the next screen choose the service type POP or IMAP.
You will then be taken to a screen where you can enter further details.
Enter the Server Details
Note: When you first create your Runbox account SMTP (outgoing mail) will be unavailable to you until you either a) validate your alternative email address (we send a validation link there when you create the account) or b) pay for a subscription. If you don’t do either of these things you will get a username/password error when trying to use our outgoing SMTP server.
Enter the details for your own account, plus the server details for Runbox.
Incoming Mail Server (IMAP): mail.runbox.com
Port: 993
Encryption method: SSL/TLS
Outgoing Mail Server (SMTP): mail.runbox.com
Port: 465
Encryption method: SSL/TLS
You can find information about the latest server details on our Email Client Settings page.
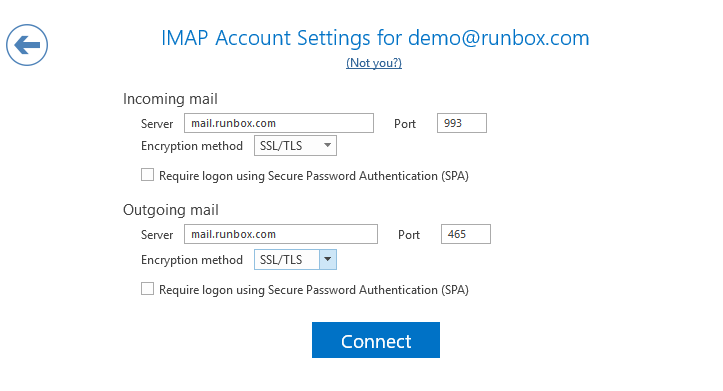
Now click Connect.
Outlook should confirm that your account is set up. If there are errors, cancel the process and try working through the instructions again.
Configure Account Settings
You might want to configure other account settings. To go back to the account settings click File > Account Settings, and then double click on your account name to open the settings window.
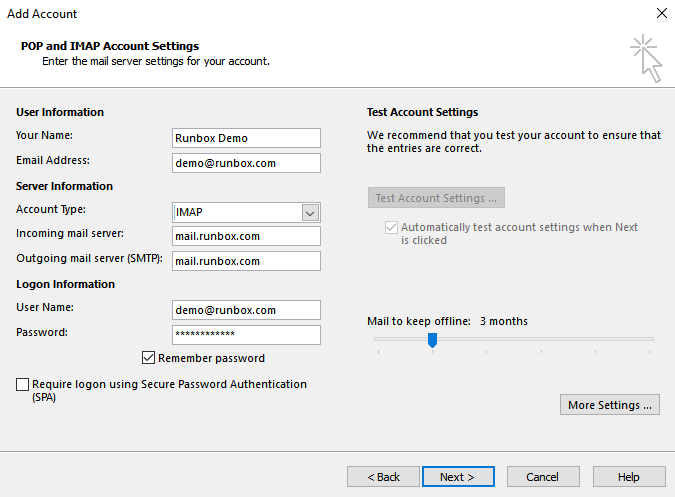
Note: The option “Mail to keep offline:” will determine how much of the mail in your Runbox account will be synchronised to Outlook. If you only need recent mail synchronised then you can choose a shorter period, but some people may prefer to see all mail in their Runbox account and can choose the “All” option which is the far right setting.
IMAP Folders
If you have created folders in your account, and they don’t show up in the left-hand bar once you have completed the set up procedure above, you may need to adjust the IMAP Folders setting in Outlook.
To change the IMAP Folders setting click on Folder > IMAP Folders.
You will then see the screen below.
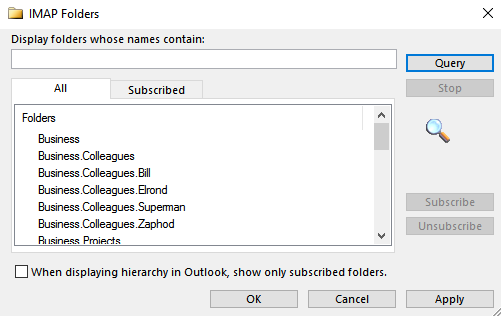
Some email programs like Outlook allow you to choose which folders of your account you want to see in your email program. This is called “Subscribing” to those folders. If you just want to see all your folders, deselect the option at the bottom of the dialogue box that says “When displaying hierarchy in Oulook, show only subscribed folders.” When you click Apply you will then see all your folders.
Alternatively, if you have more specific requirements, you can just subscribe to the folders you want to see.