
To set up Mail for Windows with Runbox, please follow the step-by-step instructions below.
Note: We do not recommend Mail for Windows if you need to send email from any alias addresses you have set up in your Runbox account as Outlook does not support sending from aliases.
Add a new account to Mail for Windows
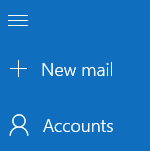
To add a new account click on Accounts on the left of the screen.
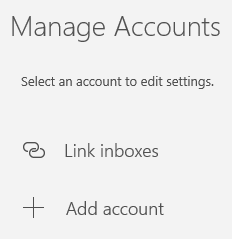
This will open a panel on the right with the option to Add account.
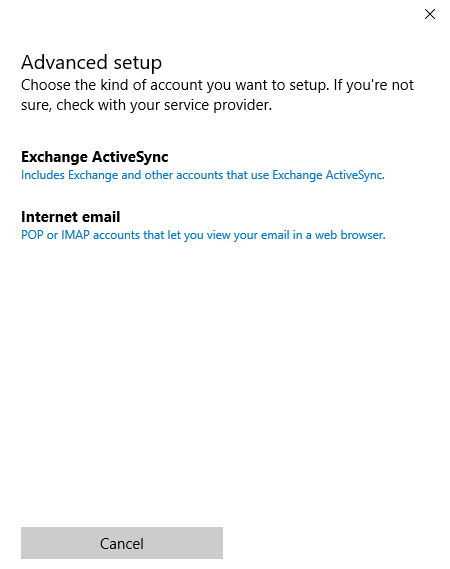
Next we recommend you choose the Advanced setup option so that you can ensure the settings for your account are correct. You might need to scroll down the list of options if you don’t see it at first.
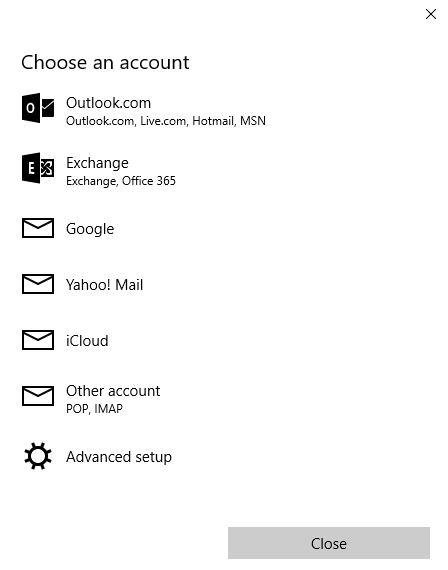
Now choose Internet email.
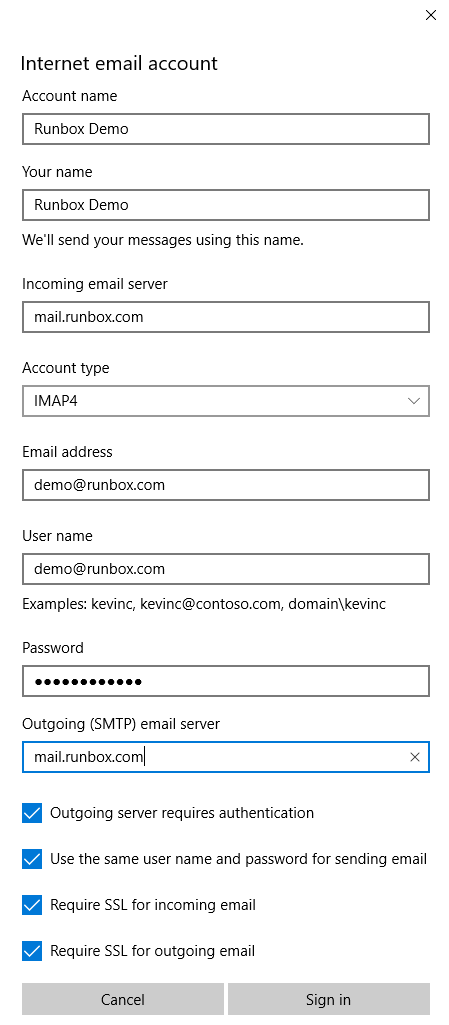
Enter the Server Details
Note: When you first create your Runbox account SMTP (outgoing mail) will be unavailable to you until you either a) validate your alternative email address (we send a validation link there when you create the account) or b) pay for a subscription. If you don’t do either of these things you will get a username/password error when trying to use our outgoing SMTP server.
Enter the details for your own account, plus the server details for Runbox.
Incoming Mail Server (IMAP): mail.runbox.com
Outgoing Mail Server (SMTP): mail.runbox.com
Username: your primary Runbox email address (aliases cannot be used as log in usernames)
You can find information about the latest server details on our Email Client Settings page.
Note: You might find you need to scroll quite a lot or make the following window larger to see all of the fields as shown below.
Now click Sign in. You should see the screen below.
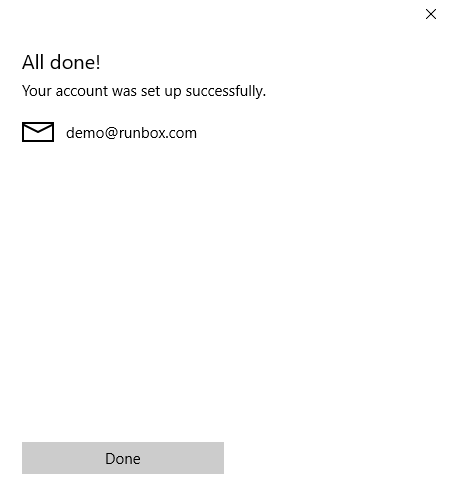
When you click Done, this will complete the set up.